
Use this FAT Partition Recovery Software to recover lost FAT partition after formatting, corruption, reformatting, and accidental deletion. Get the free trial edition now, and evaluate the recovery results for free before purchasing the license of the software. Try now!!!
Recover deleted/lost FAT partitions in Windows
Before NTFS file system was introduced, most of the PC's around the world made use of the File Allocation Table file system better known as a FAT file system. Though there are different versions of the FAT file system, the most widely used FAT version is the FAT 32 file system. It is used widely in Windows 98, 2000 Server and some of the Windows XP systems. With the advent of NTFS, usage of FAT file system has been restricted to USB drives.
The popularity of NTFS over FAT is due to the fact that advanced features are supported by NTFS file system. However, there are still laptops and USB drives that make use of the FAT file system. One of the major setbacks of the FAT file system with respect to data loss is that this file system lacks a good crash recovery or security option, which automatically makes the FAT file system more prone to data loss.
Some of the common reasons for loss of data on a hard drive with FAT file system are virus attacks, malware, accidental deletion of the partitions and loss of partitions due to a hard drive crash. Data loss is also bound to occur, when we convert the file system from FAT to NTFS. The deleted/lost FAT partitions can be recovered if you make use of a good Windows Partition recovery software to recover lost or deleted partition easily. Recover Partition tool lets you recover data from lost NTFS and FAT partitions. This Read-Only data recovery software ensures that the data present on the unaffected partitions is not affected during data recovery.

Step 1: Download and install the free version of Partition Recovery tool on your PC. After successful installation, launch the software. In the Main Screen, select "Recover Partitions" option. Then, the tool shows all the logical and physical disk drives available in the system. Choose the appropriate physical disk and click "Scan" option

Image 1 - Launch Pad
Step 2: Now, the tool scans the physical hard disk to find deleted, and lost partitions. Once scanning is complete, it displays a list of found partitions. Select the required partition, which you want to recover and hit "Scan" button to initiate the recovery process from a partition.
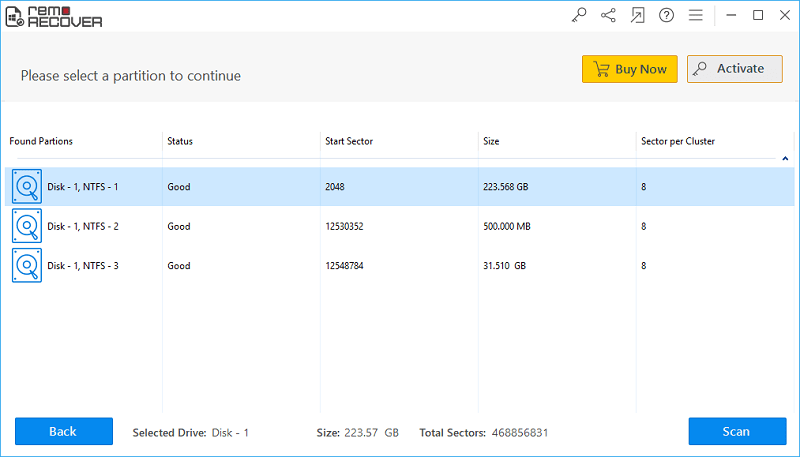
Image 2: Found Partitions
Step 3: Now, the software scans the selected partition to regain it's files back. Wait for the scanning to get complete. Upon the completion of scanning process, a list of recovered files are displayed. You can view the recovered files in Data View, and File Type View.
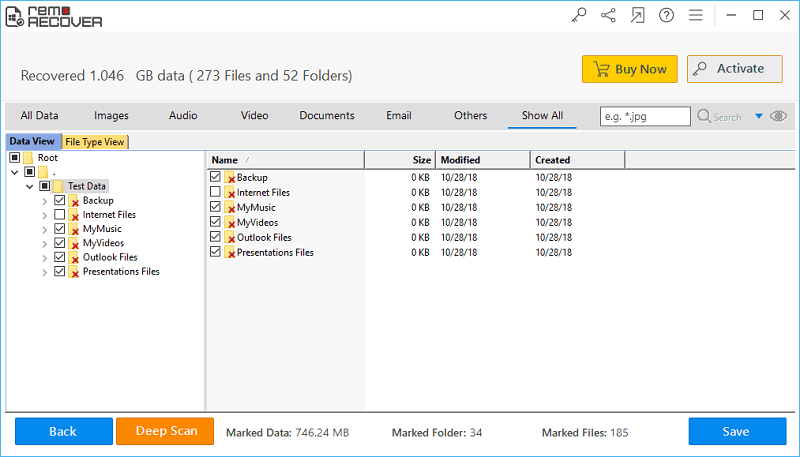
Image 3 - Recovered Data in File Type & Data Views
Step 4: Finally, at the end of recovery process, youc an preview the recoverable files by right clicking on the file and selecting Preview from the displayed options.
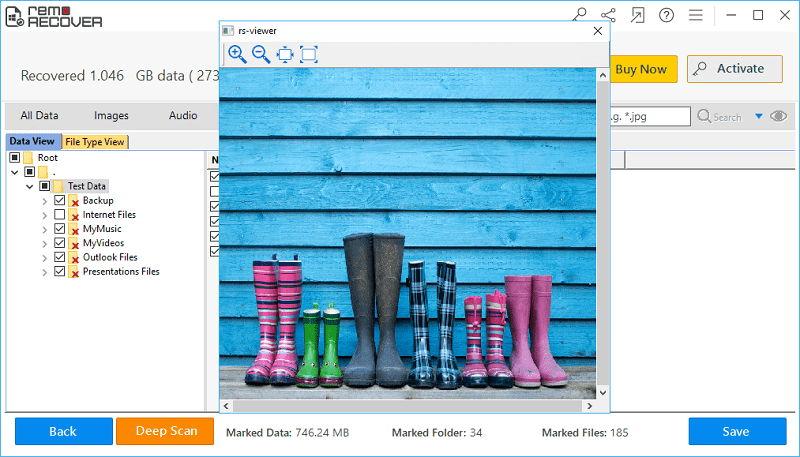
Image 4 - Preview Recovered Files
Step 5: At last, if you are satisfied with the tool, then activate the license key of the tool and select the destination drive to save the recovered files.
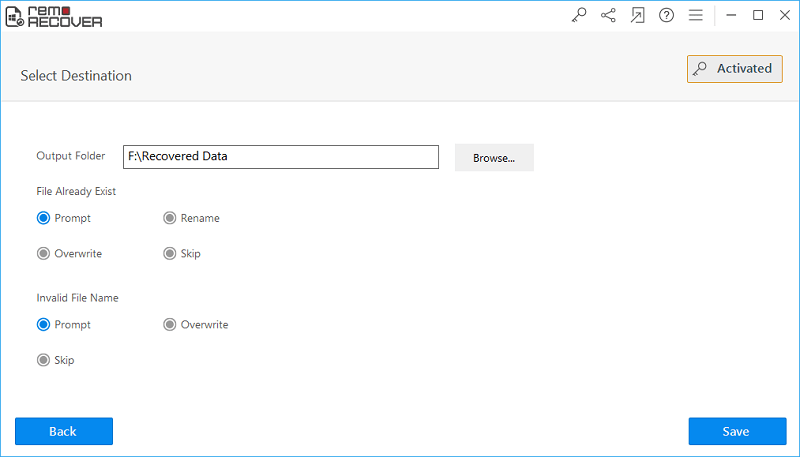
Image 5 - Save Recovered Data