
Use the free edition of Partition Recovery Program to recover files from a quick format hard drive partition. Evaluate the efficiency of the software by downloading its free demo edition and preview the recovered files before activating the license of the tool. Try now for free!!!
Software to recover data from a partition after Quick Format
Losing valuable & precious data after performing a quick format on a partition can be a distressing experience. However, there is still a hope for recovering files from a partition after quick format. In this comprehensive step-by-step guide, we will walk you through the process of recovering a partition after quick format, using reliable methods and software to increase your chances of successful recovery, and data retrieval.
What is Quick Format - Understanding it's consequencies:
A quick format is a process that erases the file system metadata on a partition, making it appear empty and ready for use. Unlike a full format, which overwrites the entire partition, a quick format does not erase the actual data stored on the disk. This provides an opportunity for partition recovery since the data may still be intact, but the file system information needs to be reconstructed.
Important Note Before we proceed recovering partition after quick format:
Before proceeding with the recovery process, it's crucial to avoid any further write operations on the formatted partition. Writing new data to the partition can overwrite the original data and significantly reduce the chances of successful recovery. Therefore, immediately stop using the partition and disconnect it if possible until the recovery process is completed.
Reliable Partition Recovery Software to Recover Data after A Quick Format:
The Partition Recovery software provides the facility to search the recovered results for different file types using in-built “Find tool” option. You can even preview the recovered data before saving it on your hard drive or CD/DVD, or in a compressed zip file. This software also works on Mac OS X such as macOS Catalina, High Sierra, Mavericks, Yosemite, Leopard, Snow Leopard, Lion, etc to restore re-partitioned hard disk volumes on Mac.

Step 1: Download and install the free version of Partition Recovery tool on your PC. After successful installation, launch the software. In the Main Screen, Select the partition from which you want to recover data, and click on the Scan button.
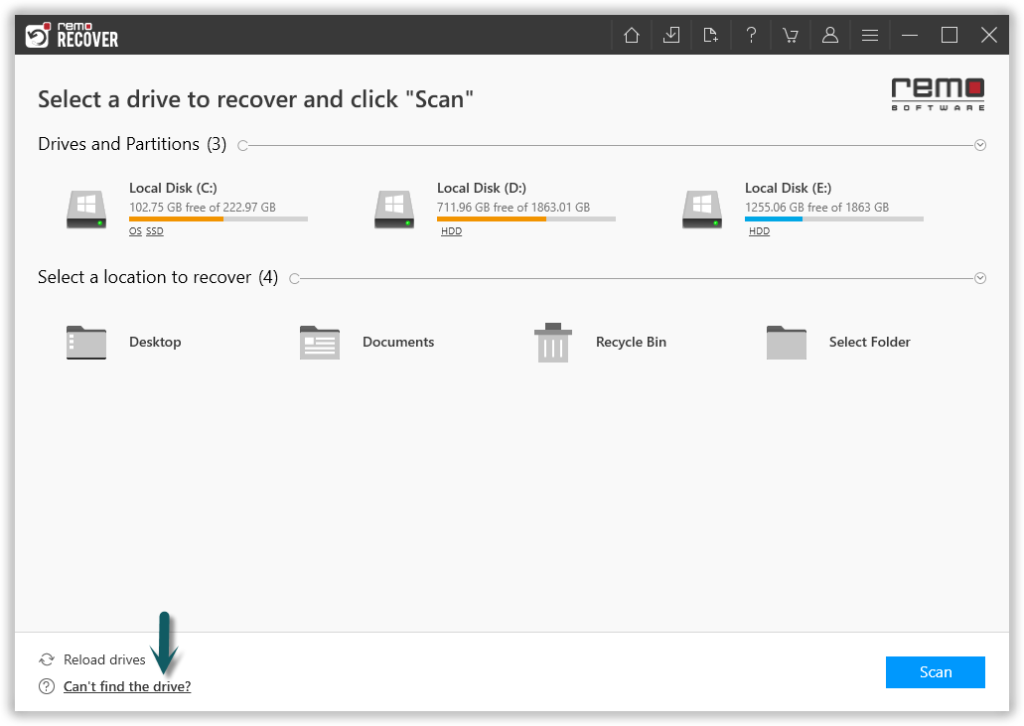
Image 1 - Launch Pad
Step 2: Once the scan starts you can click on the Dynamic Recovery View to recover the lost file during the scanning process itself.
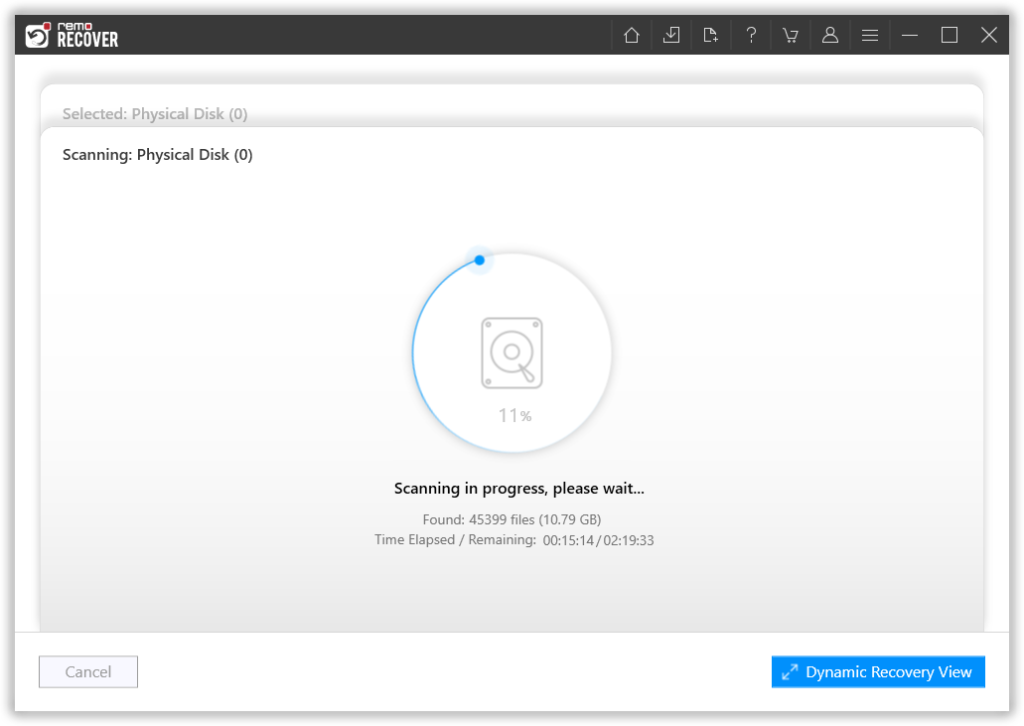
Image 2: Dynamic Recovery View
Step 3: After the scanning process, you can see your lost data under the Lost Partition folder.
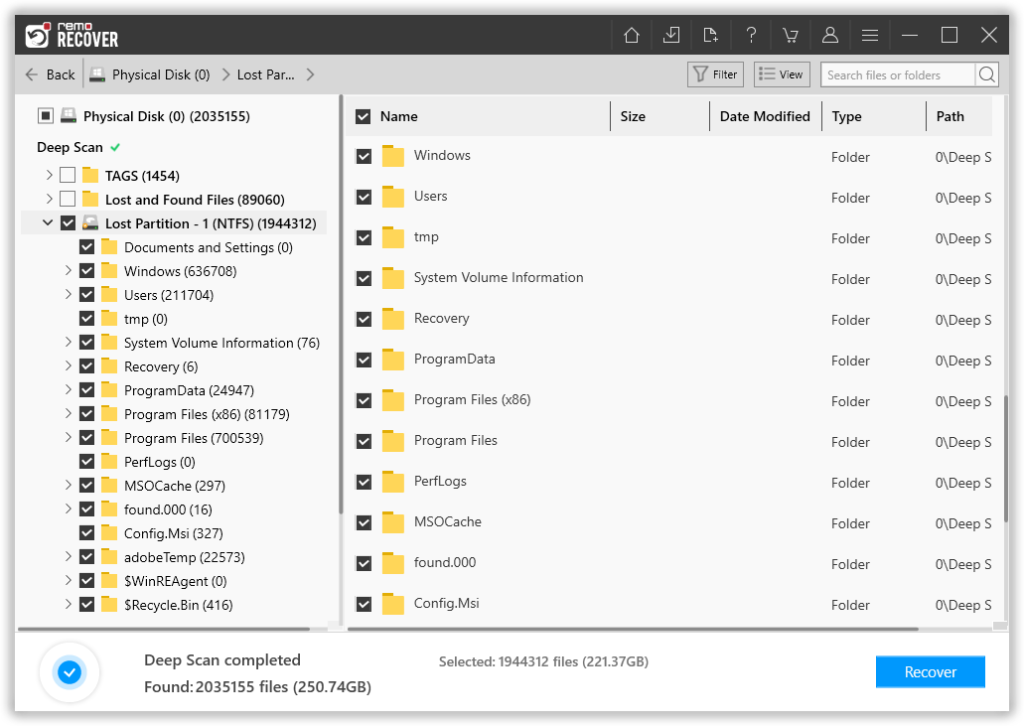
Image 3 - View Recovered Lost Data
Step 4: You can double-click on any file to Preview the recovered files such as documents, PPTs, excel sheets, photos, videos, etc.

Image 4 - Preview Recovered Files
Step 5: If you are satisfied with the recovery results, select the files which you want to restore and hit the Recover button to save them at your desired location.
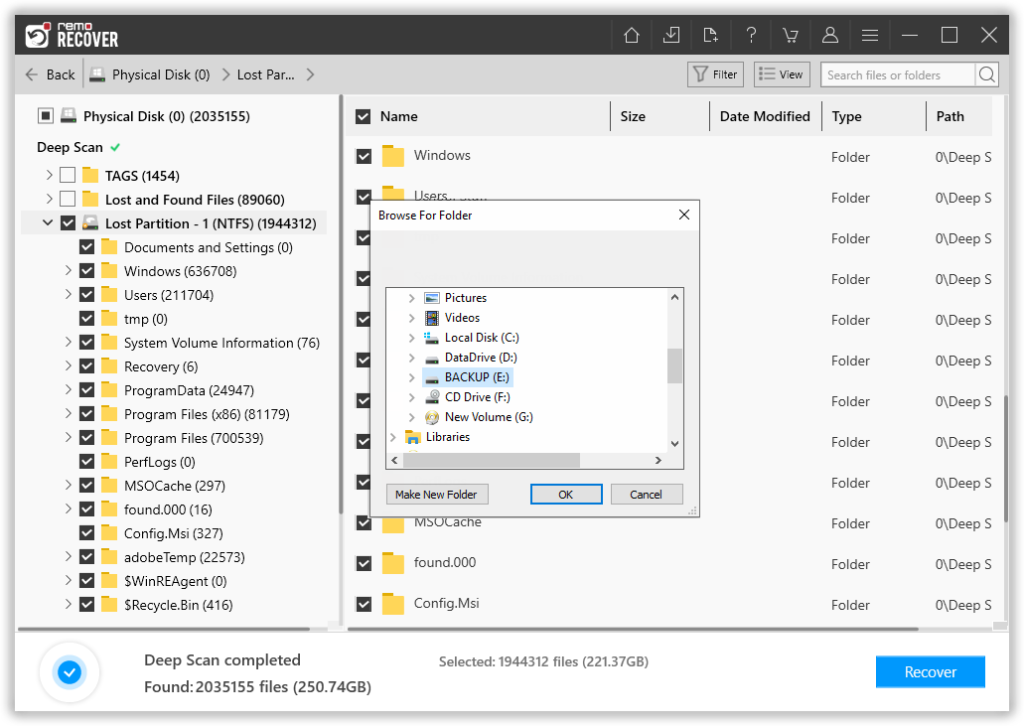
Image 5 - Save Recovered Data