
Recover your data from partitioned or re-partitioned Volumes on Mac using the free Partition Recovery tool. It recovers HFS, and HFS+ Mac Volume that is partitioned or re-partitioned on Mac Sierra, El Capitan, and earlier versions. So, get the free trial version and evaluate the recovery results for free before purchasing the license. Try now!!!
Recover Re-partitioned volumes on Mac
Mac OS X is an operating system that is incredibly powerful and is also very easy to use. Everything, right from the day to day applications that you make use of, to the files and folders that exist on your Mac are designed in a simple manner keeping the user in mind. Therefore, learning is made easy on Mac so that you don't have to spend extra time on getting used to whatever you are doing.
The factors that make Mac OS easy to use, is definitely the strong UNIX base on which it has been built. Some of the advanced features include support for high-end graphics, an interactive Finder, a Time Machine that can be used for data backup and a Disk Utility tool that can be used for partitioning the HFS+ and HFSX volumes. The Disk Utility is an easy to use tool, as the user can specify the size of the volume that he wants to create, and also the number of volumes that he wants on his hard drive.
There are also instances when a user might want to re-partition his hard drive, in order to create more volumes with the available disk space, or to remove extra volumes which the user feels is not being utilized to its full capacity. In such a case, the user can make use of Disk Utility to specify the volume that he wants to delete or create, and manage the volumes efficiently. But there are times when the re-partitioned volume gets lost or deleted after the re-partitioning process. In such cases data on the hard drive can be recovered only by using a partition recovery software. Mac Volume Recovery software is capable of recovering lost/deleted volumes on Mac. This partition recovery software is capable of recovering data from deleted/lost HFS+ and HFSX volumes on Mac.

Step 1: Double click the desktop icon or select the application from the programs list to launch Mac Data Recovery software. This displays the main window of the software, as shown in Figure a.
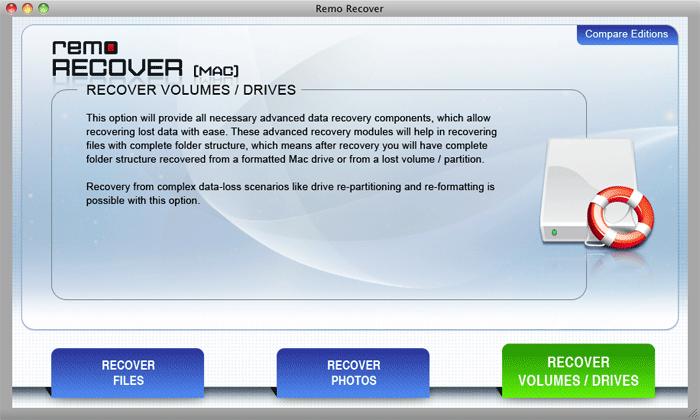
Figure a : Main window
Step 2: The drives and volumes detected by the system get displayed as shown in Figure b. Choose the drive from which the lost volumes have to be recovered, and then click the Recover button.
Figure b : Select Drive
Step 3: Just as you click the Recover button, a new window where the user can select the appropriate option, is displayed, as shown in Figure c. There three options available for the user are,
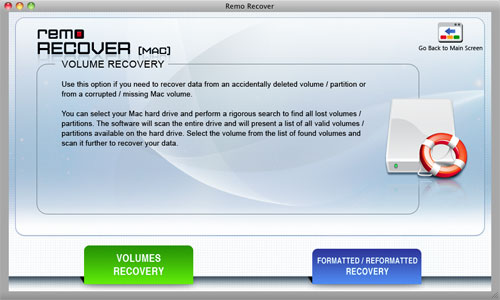
Figure c : Select appropriate option
Step 4: Select the Display default volume(s) option. Clicking the Display default volume(s) button displays the already existing volumes on the selected drive, as shown in Figure d. Select the volume which contains the deleted or lost data, and click the Next button.
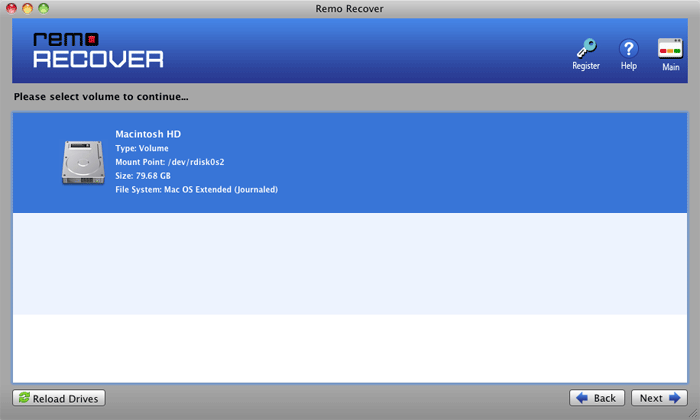
Figure d : Select volume
Step 5: Click on the Next button to select the Scan Method that you want to make use of, as shown in Figure e. You can select from two options.
Select the Standard Scan option.
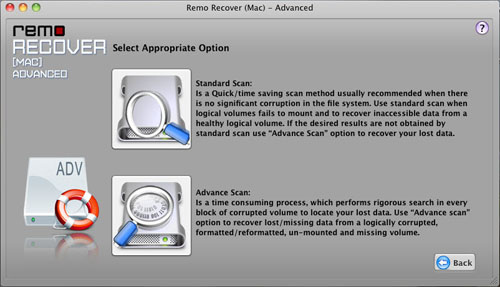
Figure e : Select Scan option
Step 6: The software starts to scan the selected drive as soon as you click the Standard Scan option. The software searches the drive for the lost data, and lists all the found files and folders, as shown in Figure f.
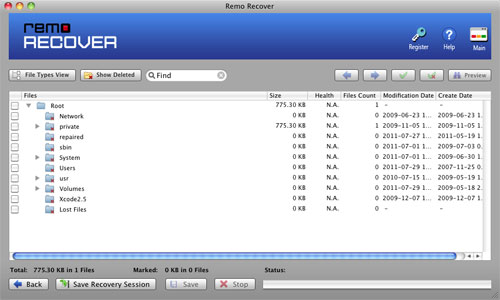
Figure f : Found files and folders
Step 7: Once the files get listed in the tree format, the next immediate step is to select a safe location where the recovered data can be saved. If you want to save all the listed files, click on the Root folder or specifically select the files you want to save, and click the Save button.
A window to choose the destination drive is displayed when you click the Save button. Specify the destination drive, where you want to save the data, and click on the Save button.
To save the data that you have selected onto the selected destination drive, click on the Save button. The data gets saved immediately. The saved data can now be accessed as before.
