How to Recover Data from Re-partitioned Hard Drive?
Use this free Partition Recovery Software to recover files from re-partitioned hard drive in just three easy steps. Get the free trial version now, and evaluate the recovery results prior to purchasing the license of the software. Try now!!!
 |
 |
Recover Partition Software
Scan
Select
Recover
 |
Recover deleted/lost data from Re-partitioned hard drive
The decision of whether or not you want to re-partition your hard drive, depends purely on the type of file system that you are using. There are times when you will need to install more than one operating system on your PC, and under these circumstances, you will need to partition the hard drive, so that memory can be allocated accordingly for efficient usage of disk space.
It is true that re-partitioning of the hard drive is possible at any given time, except under some cases like in Windows Vista, where you will need the help of a third party software in order to resize your partitions. The problem with some third party software is that there is the risk of data loss that is bound to occur during re-partitioning of the hard drive using such third party software. It is therefore good to plan your partitions well in advance so that re-partitioning can be avoided. Over partitioning can be said to be one of the main causes that lead to re-partitioning of the hard drive.
In most cases, users miscalculate the size of the partition that they need to maintain. This results in the user storing files on a particular partition, while the other partitions are left untouched with lots of space in them. This eventually results in the user trying to re-partition the drive, which leads to loss of data from the partition. In such cases, when data has been lost after re-partitioning of the hard drive, it is best to make use of a partition recovery software that can recover partition data lost after re-partitioning. Hard Disk Partition Recovery tool lets you recover lost/deleted files from re-partitioned drives easily. The easy to use interface makes data recovery a simple task even for a novice. This tool can also be utilized to retrieve partition from failed hard disk of your desktop computer or laptop.
Hard disk partition recovery software is developed by expert engineers having years of experience in the field of data recovery with advanced data recovery algorithms and they designed it with a simple user interface so that even an amateur user can recover data from the re-partitioned hard drive. This software also facilitates you to restore damaged partition in just few mouse clicks. Mac version of this tool can be utilized to recover deleted partition on almost all Mac OS X including macOS Sierra, Yosemite, Snow Leopard, Lion, Mountain Lion, Leopard, etc.
Steps to recover data from re-partitioned hard drive
Step 1: Download and install the free version of Partition Recovery tool on your PC. After successful installation, launch the software. In the Main Screen, select Recover Partitions option. Then, the tool shows all the logical and physical disk drives available in the system. Choose the appropriate physical disk and click "Scan" option

Image 1 - Launch Pad
Step 2: Now, the tool scans the physical hard disk to find deleted, and lost partitions. Once scanning is complete, it displays a list of found partitions. Select the required partition, which you want to recover and hit "Scan" button to initiate the recovery process from a partition.
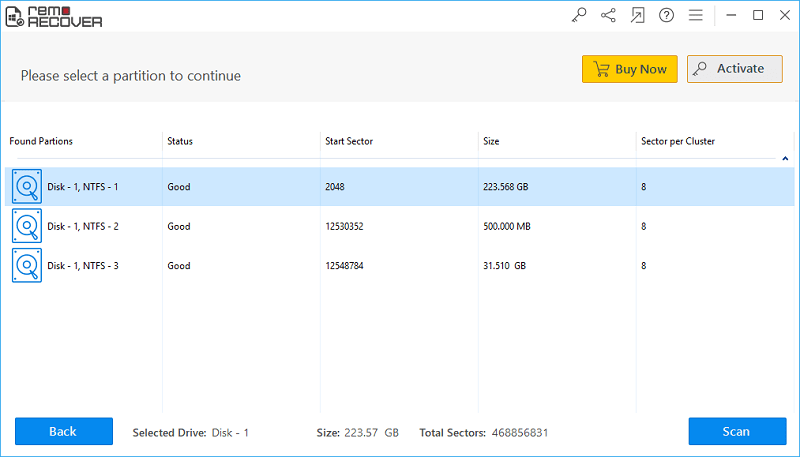
Image 2: Found Partitions
Step 3: Now, the software scans the selected partition to regain it's files back. Wait for the scanning to get complete. Upon the completion of scanning process, a list of recovered files are displayed. You can view the recovered files in Data View, and File Type View.
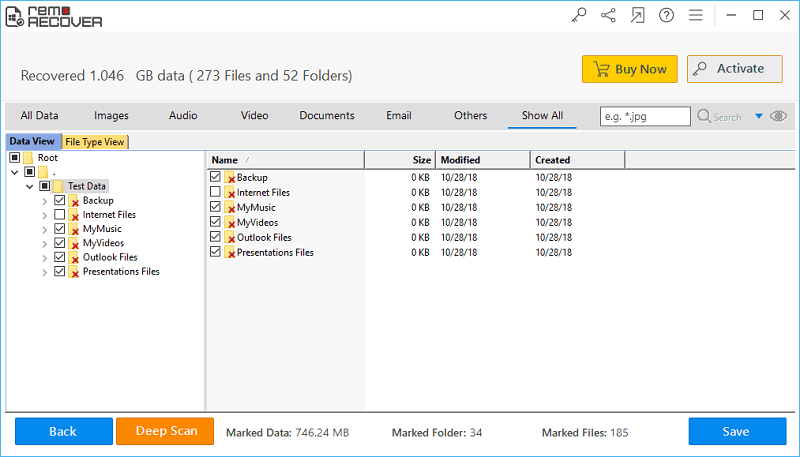
Image 3 - Recovered Data in File Type & Data Views
Step 4: Finally, at the end of recovery process, youc an preview the recoverable files by right clicking on the file and selecting Preview from the displayed options.
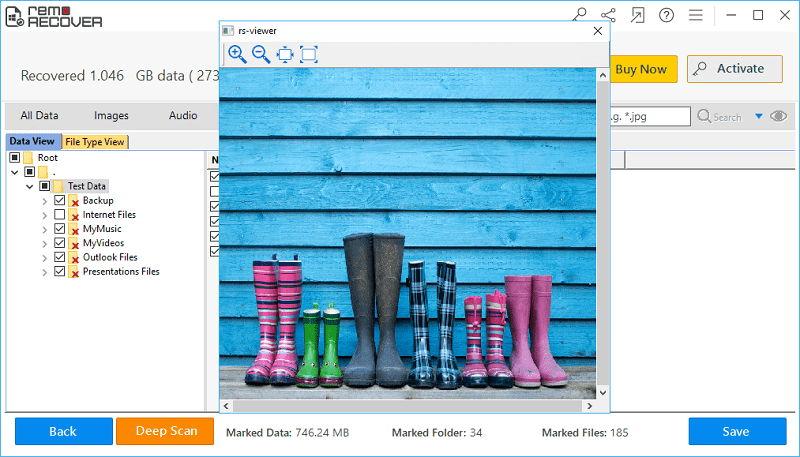
Image 4 - Preview Recovered Files
Step 5: At last, if you are satisfied with the tool, then activate the license key of the tool and select the destination drive to save the recovered files.
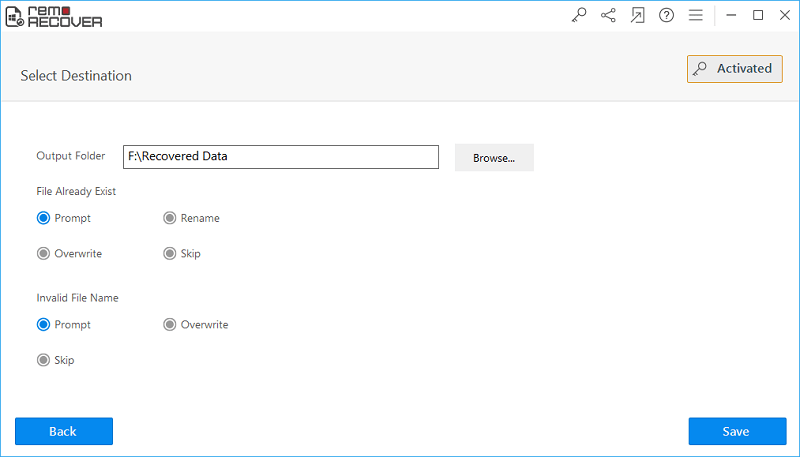
Image 5 - Save Recovered Data
![]()
![]()