Recover Deleted HFS+ and HFSX Volumes
Recover your deleted HFS volumes on Mac with the Professional Mac Partition Recovery Software. Get the free trial version now, and preview the recovered files for free before purchasing the software. Try now!!!
 |
 |
Recover Partition Software
Scan
Select
Recover
 |
Recover accidentally deleted HFS+ and HFSX volumes on Mac
The advanced features embedded in Mac are responsible for its popularity in many ways. Apple keeps doing it on a regular basis and with every new release, the latest from the Apple family being the Mac OS X Snow Leopard. Unlike PCs that run on Windows which make use of either FAT or NTFS file systems, Mac computers make use of a different file system called Hierarchical File System better known as HFS. There are various versions of HFS, the most widely used being HFS+ and HFSX file system.
Mac computers initially came out with the MFS or the Macintosh File System, which was being used in all the Mac computers that were manufactured in the first two years. Later, the HFS file system was introduced to support Apple's first hard disk drive made for Macintosh. This file system replaced the MFS file system that already existed. To support larger files, i.e. files with 32-bit block addresses, Apple introduced the HFS+ file system which made use of Unicode for naming files and folders and supported better features than HFS.
Besides HFS+ there is also Mac that makes use of HFSX volumes. Though HFSX is not as popular as HFS+, it is still used in some Mac computers. Another notable fact is that HFS+ and HFSX have no significant differences except for some minor differences in the wrapper. Even in the case of data loss, there is no noticeable difference between HFS+ and HFSX. Hence, it is best to make use of a partition recovery software, when data loss occurs. Recover partition software is a powerful data recovery software that can recover data from deleted/lost Mac partitions with ease. The software is also helpful in recovery of data from laptop hard drive partition on which Mac OS is installed. Recover partition tool is a easy to use application which is designed with user-friendly interface so that an amatuer users can recover deleted HFS volumes without any complications and in addition it allows the user to retrieve partition that is lost, deleted, formatted, or corrupted in just a few steps.
Note: The updated version of this software is available with many advanced features so that one can make use of it to recover files from lost NTFS partition, FAT, HFS, and HFSX formatted partitions on all the latest versions of Windows and Mac operating systems, as it is available in Windows & Mac editions sseparately.
Steps to recover deleted HFS Volumes on Mac:
Step 1: You can double-click the desktop icon or select the application from the programs list in the Start Menu to launch Mac Data Recovery software. This displays the main window of the software, as shown in Figure a.
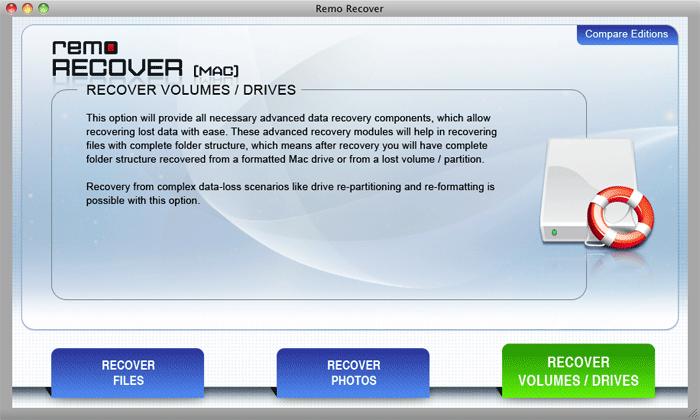
Figure a : Main window
Step 2: The drives and volumes that are detected by the system are displayed as shown in Figure b. Choose the drive from which contains the lost volumes that have to be recovered, and then click on the Recover button.
Figure b : Select Drive
Step 3: As soon as you click the Recover button, a new window pops up where the user can select the appropriate option, as shown in Figure c. There three options available for the user are,
- Display default volume(s) - This option displays the default volumes present on the system. With this you can recover data from the volumes taht already exist on the system.
- Scan for volume(s) - This option can be used to search for lost, corrupted and missing partitions. The software does a scan of the system and displays the lost, missing and corrupted partitions if any..
- Raw Search on Physical Drive (File Recovery) – This option enables you to perform an extensive sector by sector search for lost files.
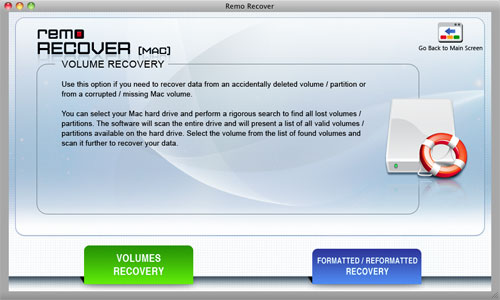
Figure c : Select appropriate option
Step 4: Select the Display default volume(s) option. Clicking on the Display default volume(s) button displays the already existing volumes on the selected drive, as shown in Figure d. Select the volume which contains the deleted or lost data, and click on the Next button.
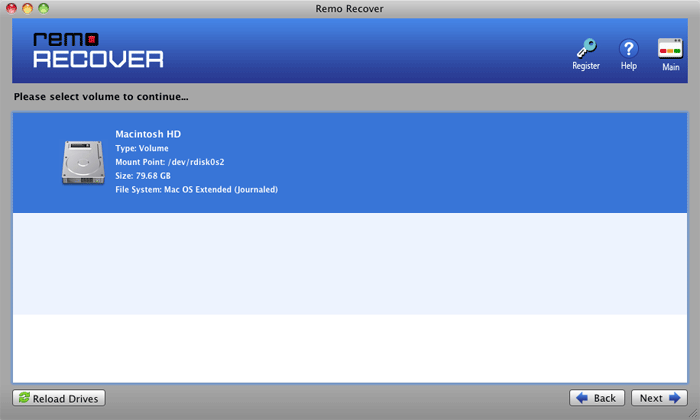
Figure d : Select volume
Step 5: Click on the Next button to choose the Scan Method that you want to make use of, as shown in Figure e. You can choose from two options.
- Standard Scan- This is a swifter and a more time-saving scanning process, which can be used, if the file system is not corrupted severely. We can use this scan method when the logical volume fails to mount.
- Advanced Scan- This is a scanning method that takes more time, but is more effective than the Standad scan method, since it does an exhaustive search on the selected drive.
Select the Standard Scan option.
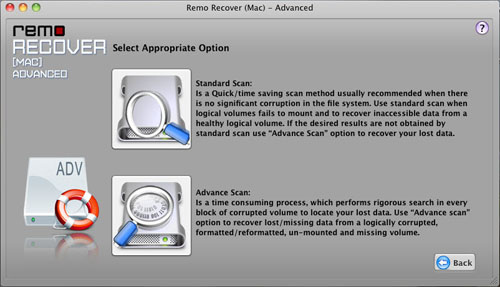
Figure e : Select Scan option
Step 6: The software starts to scan the chosen drive as soon as you click the Standard Scan option. The software searches the drive for the data that has been lost, and lists all the found files and folders, as shown in Figure f.
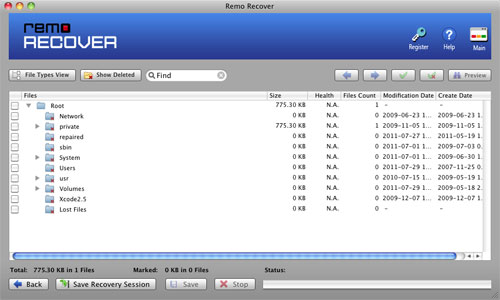
Figure f : Found files and folders
Step 7: Once the files are listed in the form of a tree structure, the next immediate step is to select a safe location where the recovered data can be saved. If you want to save all the files that have been listed, click on the Root folder or specifically select the files you want to save, and click the Save button.
A window to choose the destination drive is displayed when you click on the Save button. Specify the destination drive, where you want to save the data, and click on the Save button.
To save the data that you have selected onto the selected destination drive, click on the Save button. The data gets saved immediately. The saved data can now be accessed as before.
![]()
![]()