Recover Files after Reinstalling Windows XP
Lost your crucial files after reinstalling Windows XP? Don't worry! You can easily get them back with Recover Partition Software. It recovers the lost or deleted files from NTFS, NTFS5, exFAT, FAT16, and FAT32 partitioned drives for free. Download the free trial version now, and evaluate the recovery results for free now!!!
 |
 |
Recover Formatted Partition
Scan
Select
Recover
 |
Software to Recover partition after Windows XP Re-installation
Partitions on hard drive, sometimes, may get corrupted due to which they become inaccessible to the host operating system and formatting the partition remains the only option to salvage the data present on it. However, if the corrupted partition contains the Windows operating system, then you have to reinstall Windows XP in order to make your computer hard drive accessible. After reinstalling, you should use partition recovery software to restore partition after reinstalling Windows XP. This powerful software has the ability to scan all the partitions of hard drive to recover files stored on them and perform complete partition recovery from laptop hard drive. This advanced recovery tool, which can even recover partition from USB, helps you to recover files with the complete folder structure. Hence after recovery, you will have complete directory structure recovered from a formatted drive or lost partition.
It provides an option to find files from recovered data on the basis of their unique signatures, and also you can even preview the recovered file before saving it on a hard drive or CD/DVD. It will retrieve lost files from formatted Seagate hard drive with ease. This recovery tool can be used in following cases:
- Lost/Deleted partition: In case of accidental deletion or loss of partition, this can be used to recover lost or deleted FAT partition and also NTFS partition.
- Repartitioning hard drive: If you delete and create new partitions on your hard drive, data is lost in the process. So, this software comes in to picture which can retrieve re-partitioned hard drive.
- Reformatting partition: When you format any partition and change even its file system, it is called reformatting a partition. Again, this partition recovery tool helps you to restore reformatted partition and hence restore the entire data present on it.
![]()
Following are the steps to use Partition Recovery software to recover your partition after reinstallation of Windows XP:
Step A: Run the software after installing it, welcome screen appears as shown in Fig a. Select “Recover Partitions/Drives” option.

Fig a: Welcome Screen
Step B: In the new window, select “Formatted/Reformatted Recovery”, as shown in Fig b.
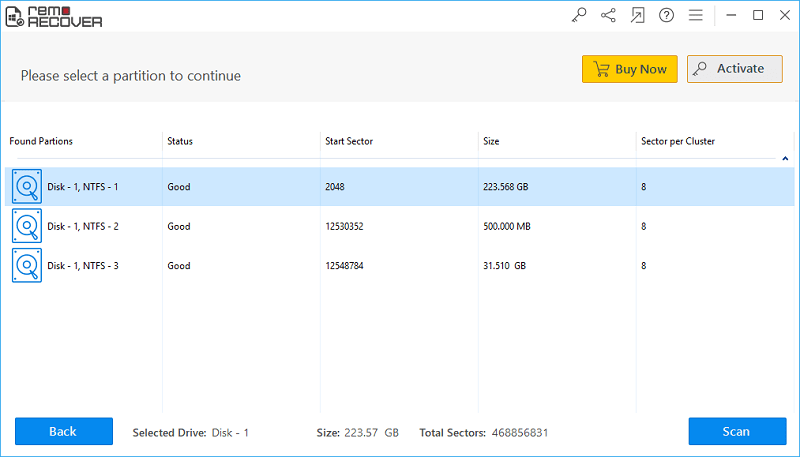
Fig b: Formatted/Reformatted Recovery
Step C: A list of detected drives is displayed in the next screen, as shown in Fig c, select appropriate partition and click “Next”.
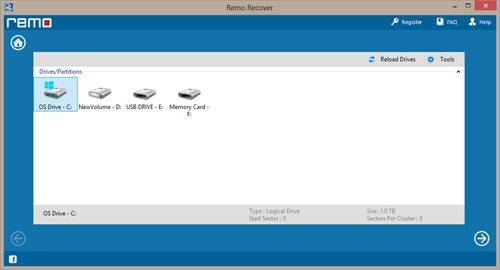
Fig c: List of drives
Step D: Once the recovery process completes, list of entire recovered data is displayed that can be viewed using “File Type view” or “Data view” option, as shown in Fig d.
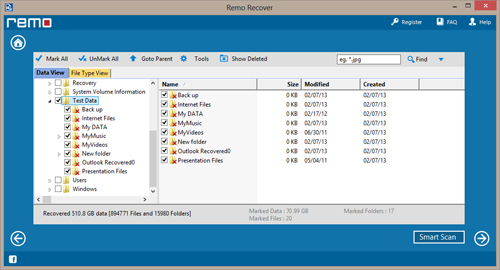
Fig d: Recovered data list
Step E: Preview the recovered file using “Preview” option and save the data after selecting the required data, as shown in Fig e.
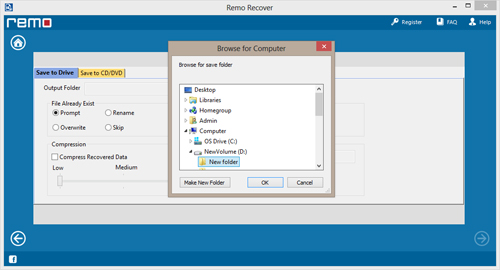
Fig e: Saving Recovered Files
![]()
![]()